
Considering a redwood fence for your property? Before diving into the installation process, it’s essential to understand the fundamentals. Redwood offers both aesthetic appeal and durability, making it a popular choice for fencing projects. However, successful installation requires careful planning and execution.
In this guide, we’ll explore everything you need to know about installing a redwood fence. From selecting the right materials to understanding the installation process, we’ll cover the essential steps to ensure your fence stands strong and enhances the beauty of your property. Whether you’re a seasoned DIY enthusiast or seeking professional assistance, this article will equip you with the knowledge needed to make informed decisions for your redwood fence installation project.
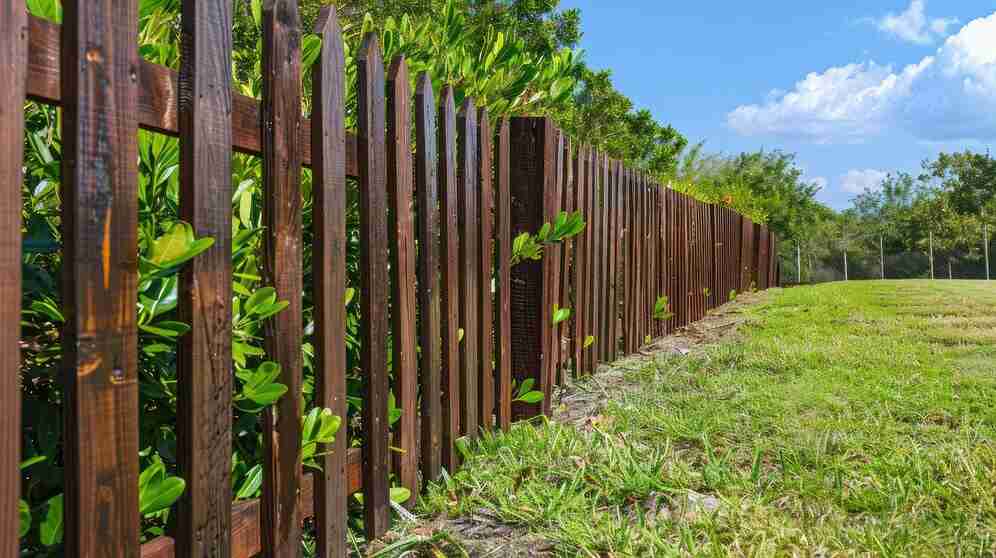
Choosing the Right Type of Redwood
When selecting the right type of redwood for your fence, consider the following factors:
- Durability: Choose a redwood grade known for its durability, such as heartwood, to ensure your fence withstands the test of time and environmental elements.
- Resistance to decay: Opt for redwood with natural resistance to decay, which helps prevent rotting and extends the lifespan of your fence.
- Aesthetic appeal: Select redwood with a rich, attractive grain pattern and color that complements your property’s aesthetics, enhancing its overall appearance.
- Budget considerations: Balance quality and cost by exploring different redwood grades and selecting one that fits within your budget while still meeting your durability and aesthetic requirements.
- Sustainability: Choose redwood sourced from sustainably managed forests to minimize environmental impact and support responsible forestry practices.
By carefully considering factors such as durability, resistance to decay, aesthetic appeal, budget considerations, and sustainability, you can confidently choose the right type of redwood for your fence, ensuring a beautiful and long-lasting addition to your property.
Determining Fence Height and Layout
When planning your redwood fence, it is crucial to consider both functionality and aesthetics. Begin by evaluating your property’s requirements for privacy, security, and visual appeal. Check local regulations and community guidelines for fence height and placement restrictions. Sketch out a layout, marking boundaries, corners, and potential obstacles such as trees or structures. Take precise measurements to calculate the necessary amount of redwood lumber and materials for the project.
By strategically planning the height and layout of your fence, you can construct a barrier that not only serves its practical purposes but also enhances the overall appearance of your property. Taking these steps ensures a successful fence installation that meets both your needs and the requirements of your community.
Preparing Your Property for Installation
Before diving into the installation process, it’s essential to prepare your property to ensure a smooth and successful project. Start by locating and marking underground utilities to avoid accidental damage during digging. Clear the area along the fence line of any debris, vegetation, or obstacles that may interfere with installation.
If your property has uneven terrain, consider grading the area to create a level surface for the fence. Additionally, check local regulations and obtain any necessary permits before proceeding with installation. Taking the time to properly prepare your property will help streamline the installation process and minimize potential challenges along the way.
Tools and Materials Needed
When embarking on a redwood fence installation project, having the right tools and materials is essential for a successful outcome. Here’s what you’ll need:
- Post hole digger or auger: Use either tool to dig proper holes for sturdy fence post placement in the ground.
- Level: Ensure horizontal alignment of fence components for a professional and aesthetically pleasing finish to the fence.
- Tape measure: Accurate measurements are crucial for ensuring a precise and uniform layout of the fence components.
- Circular saw: Use a circular saw to cut redwood lumber to size for fence posts, rails, and panels as needed.
- Hammer and screwdriver: Essential tools for securing hardware and fasteners during the assembly and installation of the fence components.
With these tools and materials on hand, you’ll be well-equipped to tackle your redwood fence project with confidence and precision.
Setting Fence Posts Correctly
Properly setting the fence posts is critical to the stability and longevity of your redwood fence. Begin by marking the locations for the fence posts along the fence line at evenly spaced intervals. Use a post hole digger or auger to dig holes that are deep enough to accommodate one-third of the post length plus an additional 6 inches for gravel or concrete.
Place a few inches of gravel in the bottom of each hole to promote drainage and prevent wood rot. Then, set the posts in the holes, ensuring they are plumb and aligned with the layout of the fence. Finally, fill the holes with concrete, making sure the posts are securely anchored. Allow the concrete to cure completely before proceeding with the next steps of the installation process.
Installing Horizontal Rails
Once the fence posts are set, the next step is to install the horizontal rails that will support the redwood fence panels. Start by measuring and cutting the rails to the appropriate length, ensuring they fit securely between the posts. Utilize a level to guarantee that the rails are installed evenly and horizontally for a professional finish.
Depending on the fence design, attach the rails to the posts using screws or nails. Leave adequate space between the rails to accommodate the fence panels and allow for the natural expansion and contraction of the wood. Properly installed horizontal rails play a crucial role in providing structural support and ensuring the long-term durability and integrity of the fence.
Attaching Redwood Fence Panels
With the rails in place, it’s time to attach the redwood fence panels to complete the installation. Start by positioning the first panel between two posts, ensuring it is level and plumb. Use screws or nails to secure the panel to the rails, making sure to leave a small gap between the bottom of the panel and the ground to prevent water damage.
Continue installing additional panels, checking for level and alignment as you go. If necessary, cut panels to size using a circular saw to fit within the layout of the fence. Once all the panels are installed, step back and admire your newly completed redwood fence.
Adding Gates and Gate Hardware
If your redwood fence includes gates, it is essential to install them along with the necessary hardware for proper operation. Start by attaching the gate hinges to the gate posts, ensuring they are aligned correctly and securely fastened to prevent sagging or misalignment. Hang the gate on the hinges and test for smooth operation to ensure it opens and closes smoothly.
Install a latch or lock mechanism to secure the gate when not in use, providing added security and peace of mind. Consider adding decorative hardware such as handles or finials to enhance the aesthetic appeal of the gates, adding a touch of elegance to your fence. Well-installed gates and hardware not only enhance the functionality and convenience of your redwood fence but also contribute to its overall design and beauty.
Applying Finishes and Sealants
To protect your redwood fence and enhance its natural beauty, consider applying finishes and sealants. Start by thoroughly cleaning the surface of the fence to remove dirt, debris, and mildew. Allow the wood to dry completely before applying any finishes. Choose a high-quality wood stain or sealer specifically designed for redwood to provide protection against moisture, UV rays, and other environmental factors.
Apply the finish evenly using a brush, roller, or sprayer, following the manufacturer’s instructions for best results. Depending on the product, you may need to apply multiple coats for optimal protection and longevity. Once the finish is dry, your redwood fence will have a beautiful, durable surface that enhances the appearance of your property.
Maintaining Your Redwood Fence
Regular maintenance is key to ensuring the longevity and beauty of your redwood fence. Inspect the fence periodically for signs of damage, such as cracks, warping, or rot, and make any necessary repairs promptly to prevent further deterioration. Clean the surface of the fence annually to remove dirt, grime, and mildew using a mild detergent and water.
If necessary, lightly sand the surface to smooth out any rough areas before applying a fresh coat of finish or sealant. Trim any overhanging vegetation that could potentially damage the fence or impede airflow. By taking proactive steps to maintain your redwood fence, you can enjoy its beauty and functionality for years to come.
In conclusion, installing a redwood fence requires careful planning, attention to detail, and the right materials and tools. By following the steps outlined in this guide, you can create a durable, beautiful fence that enhances the value and appearance of your property. Remember to consider factors like the type of redwood, fence height and layout, proper installation techniques, and regular maintenance to ensure long-term success. Whether you’re a DIY enthusiast or seeking professional assistance, a well-constructed redwood fence can provide years of privacy, security, and aesthetic appeal.
For expert assistance with your redwood fence project, contact High Quality Fence at 1112 N. Main Street #171, Manteca, CA 95336, or call 209-815-9015. Email us at info@highqualityfence.com to schedule a consultation and take the first step towards enhancing your property with a high-quality redwood fence.